Easy Homemade Chicken Broth from Kitchen Scraps
Can I make chicken broth if I don’t own and raise my own meat birds?
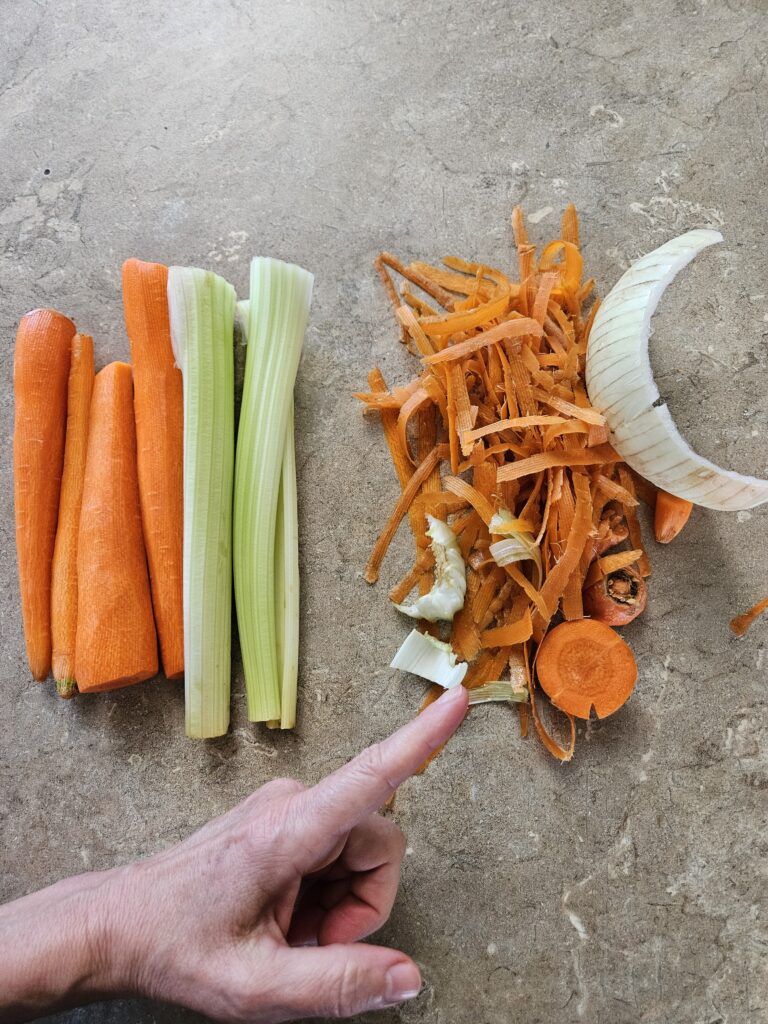
Simply put, if you eat chicken with bones, you can make homemade chicken broth! And, to add to the flavor, you can add all those leftover pieces of veggies you typically throw away, you know…the ends of the carrots, the onion skins and that floppy celery that is not spoiled, and still usable even with the crunch factor gone! So, if you eat just chicken breasts or just chicken thighs (pieces versus a whole chicken) – save the bones and freeze them! Freeze your leftover veggies! When you have a decent amount saved, make chicken broth.
Why Homemade Chicken Broth is Worth the Time
We use to buy all of our chicken broth at the store. It’s a relatively cheap purchase, even when you buy it organic. But here’s the deal, it’s largely void of nutrients compared to homemade chicken broth. When you pressure cook it or slow cook it, it extracts many of the nutrients from the chicken, as well as the nutrients of any vegetables you might choose to add to your chicken broth. The flavor of your chicken broth will be like nothing you could buy at the store. I consider my chicken broth to be the liquid gold in my kitchen. I only share it with people, such as my adult children, who understand the value of this broth. Absolute liquid gold. If I were to sell it, it would be very expensive!
Equipment
The method I will be sharing below is the crockpot method. Currently, we use a Presto Pressure Cooker to make our chicken broth. A third method is to do it on the stove at a low temperature. The recipe below is specifically for the crockpot method, which we have used numerous times.
The other crucial tools you will need include a strainer and cheesecloth. The particular cheesecloth we use I highly recommend simply due to its grade -100 weave (finer weave for catching particles) and it is washable. So, for straining the chicken broth, cheesecloth with a finer weave (a higher grade number) will filter out more particles. We have used lots of cheesecloth and have learned what works for us; the link I recommended above we chose because it is hemmed, not bleached, and the grade number is high. Hemmed cheesecloth is helpful if you plan to wash and reuse it! Today I’m going to share our crockpot method, simply because it is the easiest in terms of time and equipment that is readily available for most folks.
Learning how to make homemade chicken broth from chicken bones and vegetable scraps is one of the easiest ways to turn kitchen leftovers into something nutritious and flavorful. And if you don’t like the price of meat in the store, make it do double duty by making broth! Let’s get to it!
Ingredients
- Chicken carcass
- Leftover pieces of vegetables (celery, onion skins, carrots, green beans, mushrooms, and more!)
- Leftover pieces of herbs that you didn’t need (rosemary, dill, basil, thyme)
- Water
- Apple cider vinegar
Directions
Step One
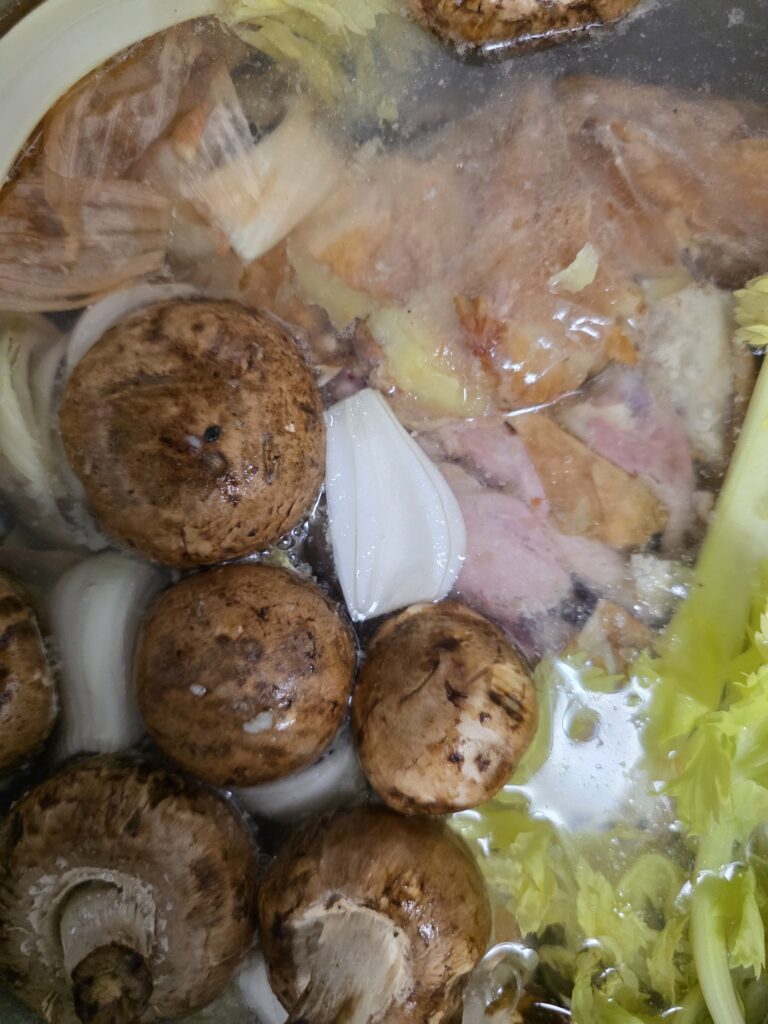
Gather ingredients. This will vary based on what you cook in your kitchen. Gather all leftover veggies and chicken bones that you have saved and place them in your crockpot, about half full. The bigger the crockpot obviously the more you can make and the less often you have to make it! No matter the size of your crockpot, it should only be half full of chicken bones and veggie leftovers.
Step Two
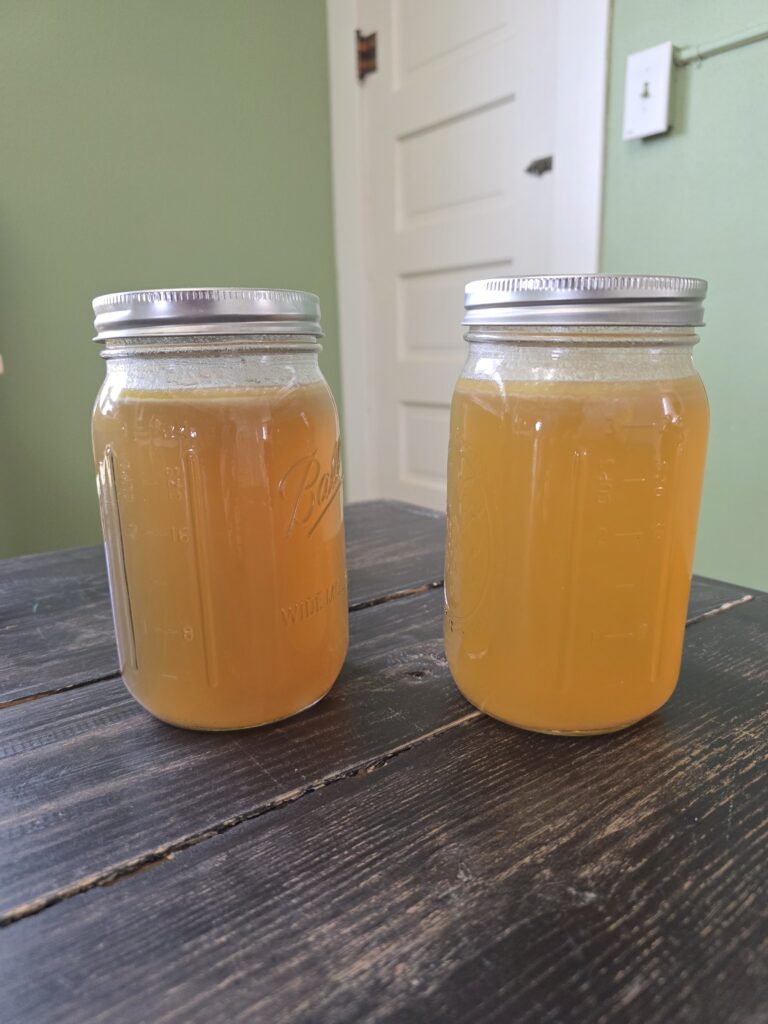
Fill your crockpot with water until it is at least two inches above your veggies and chicken bones. If you choose to fill it higher, obviously your chicken broth will be more diluted which is not a problem, it just may not be as flavorful and the color will most likely be lighter! As you can see, the jar on the left is slightly darker than the jar on the right.
Step Three
Next add your apple cider vinegar to your crockpot. If you are using a 6 to 8 quart crockpot, two tablespoons should be plenty.
Step Four
Now, simply slow cook it! We personally cook it overnight, covered, for at least 12 hours on low. That’s literally all you do.
Step Five
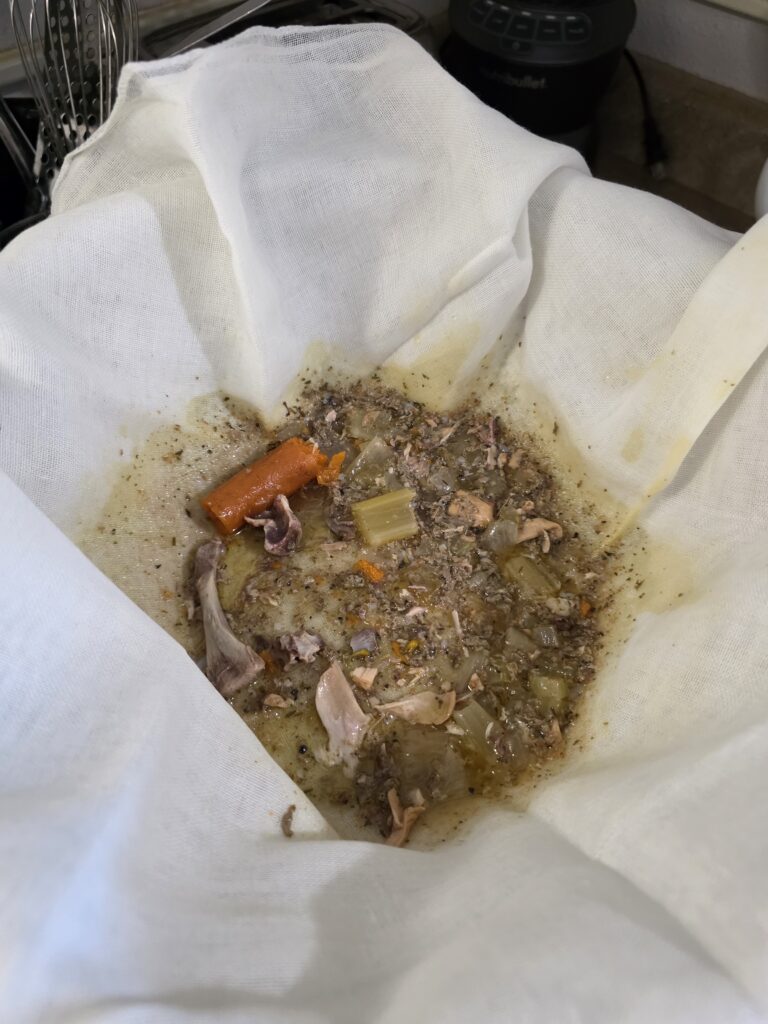
When it is ready, pull out all of the bones and veggies using a large slotted spoon and discard the bones and veggies. A slotted spoon will save you a lot of time if you have one! Now it’s time to pour your chicken broth through a strainer lined with cheesecloth into a large bowl or bowls. We typically strain ours using two layers of cheesecloth laid inside the strainer. We strain ours multiple times, at least twice, until we feel we have removed all the solids from the broth. It’s important to do this while it is still warm, otherwise, the gelatin will solidify. At this point, you pick your storing method.

Step Six
The next step is determining how you want to store it. You can do it one of the following ways:
Refrigerate for a few days using an airtight container.
Freeze for approximately six months or so. You can absolutely freeze it in mason jars, however, we have had jars (even with plenty of headspace) crack and ruin the product. Don’t ask my husband about all the lost goat milk – it is a sore subject 🙂 If I froze chicken broth, I personally would use freezer bags laid flat that can be stacked. Or perhaps ice cube trays.
Pressure Canning. We have a Presto Pressure Canner and we simply use the directions found here starting on page 20. Simple and easy! Be sure you label your jar lids, no matter how great you think your memory is! We always label them “chicken broth” with the month and year.
We have done all three depending on the amount of chicken broth we make!
Helpful Tips for Homemade Chicken Broth
Why add apple cider vinegar?
Adding a small amount of apple cider vinegar helps draw minerals and nutrients from the bones during the cooking process. You won’t taste the vinegar in the finished broth, but it helps create a richer, more nutritious homemade chicken broth.
Why does homemade chicken broth sometimes turn into jelly?
That jelly-like texture is actually a good sign! It means the collagen and gelatin from the chicken bones have been successfully extracted during cooking.
Should I add salt and pepper to my chicken broth?
I would recommend that you do not. If you add salt and pepper, it could create an imbalance with any recipes you use in the future that call for chicken broth and also require a bit of salt and pepper in the recipe.
Easy Homemade Chicken Broth from Kitchen Scraps
Equipment
- The method I will be sharing below is the crockpot method. Currently, we use a Presto Pressure Cooker to make our chicken broth. A third method is to do it on the stove at a low temperature. The recipe below is specifically for the crockpot method, which we have used numerous times.
- The other crucial tools you will need include a strainer and cheesecloth. The particular cheesecloth we use I highly recommend simply due to its grade -100 weave (finer weave for catching particles) and it is washable. So, for straining the chicken broth, cheesecloth with a finer weave (a higher grade number) will filter out more particles. We have used lots of cheesecloth and have learned what works for us; the link I recommended we chose because it is hemmed, not bleached, and the grade number is high. Hemmed cheesecloth is helpful if you plan to wash and reuse it! Today I’m going to share our crockpot method, simply because it is the easiest in terms of time and equipment that is readily available for most folks.
- Learning how to make homemade chicken broth from chicken bones and vegetable scraps is one of the easiest ways to turn kitchen leftovers into something nutritious and flavorful. Let’s get to it!
Ingredients
- Ingredients
- Chicken carcass
- Leftover pieces of vegetables celery, onion skins, carrots, green beans, mushrooms, and more!
- Leftover pieces of herbs that you didn’t need rosemary, dill, basil, thyme
- Water
- Apple cider vinegar
Instructions
- Gather ingredients. This will vary based on what you cook in your kitchen. Gather all leftover veggies and chicken bones that you have saved and place them in your crockpot, about half full. The bigger the crockpot obviously the more you can make and the less often you have to make it! No matter the size of your crockpot, it should only be half full of chicken bones and veggie leftovers.
- Fill your crockpot with water until it is at least two inches above your veggies and chicken bones. If you choose to fill it higher, obviously your chicken broth will be more diluted which is not a problem, it just may not be as flavorful and the color will most likely be lighter! As you can see, the jar on the left is slightly darker than the jar on the right.
- Next add your apple cider vinegar to your crockpot. If you are using a 6 to 8 quart crockpot, two tablespoons should be plenty.
- Now, simply slow cook it! We personally cook it overnight, covered, for at least 12 hours on low. That's literally all you do.
- When it is ready, pull out all of the bones and veggies using a large slotted spoon and discard the bones and veggies. A slotted spoon will save you a lot of time if you have one! Now it's time to pour your chicken broth through a strainer lined with cheesecloth into a large bowl or bowls. We typically strain ours using two layers of cheesecloth laid inside the strainer. We strain ours multiple times, at least twice, until we feel we have removed all the solids from the broth. It's important to do this while it is still warm, otherwise, the gelatin will solidify. At this point, you pick your storing method.
- The next step is determining how you want to store it. You can do it one of the following ways:Refrigerate for a few days using an airtight container.Freeze for approximately six months or so. You can absolutely freeze it in mason jars, however, we have had jars (even with plenty of headspace) crack and ruin the product. Don't ask my husband about all the lost goat milk – it is a sore subject 🙂 If I froze chicken broth, I personally would use freezer bags laid flat that can be stacked. Or perhaps ice cube trays.Pressure Canning. We have a Presto Pressure Canner and we simply use the directions found here starting on page 20. Simple and easy! Be sure you label your jar lids, no matter how great you think your memory is! We always label them "chicken broth" with the month and year.We have done all three depending on the amount of chicken broth we make!


I have always wanted to try this. Thank you for explaining the steps!
You are so welcome!!! Enjoy!!
I’ve honestly been intimidated to make broth, but you make it seem very simple! I will have to try it myself!!
Please keep me posted! It really is so easy. I feel like we’ve been “trained” to think simple things are complicated and therefore must be purchased at the store!
Love making chicken broth! I’ve never tried adding apple cider vinegar before! Do you add it for health benefits or flavor or both? Just curious 😃
Such a great question – the apple cider vinegar helps extract the nutrients and minerals from the bones! Thank you for asking!!!
Love this simple recipe. I also like to use stock for my dog’s food, but it’s really hard to find it without onion. This is a perfect, and affordable solution for her too!
Oh I love it that you are using if for your dogs too 🙂 We are huge dog lovers here!!!! I’m so glad this helped!
This is a great share..thanks! Making broth is such a great way to use up “scraps” that are normally tossed. 🙂
You are so welcome and I’m so glad it helped!!!